Homemade caramel and walnuts make an incredible combination for this easy ice cream! It's quick to make, no churning or equipment required, and no eggs. Because this recipe does have sugar it stays nice and soft even after days of freezing!
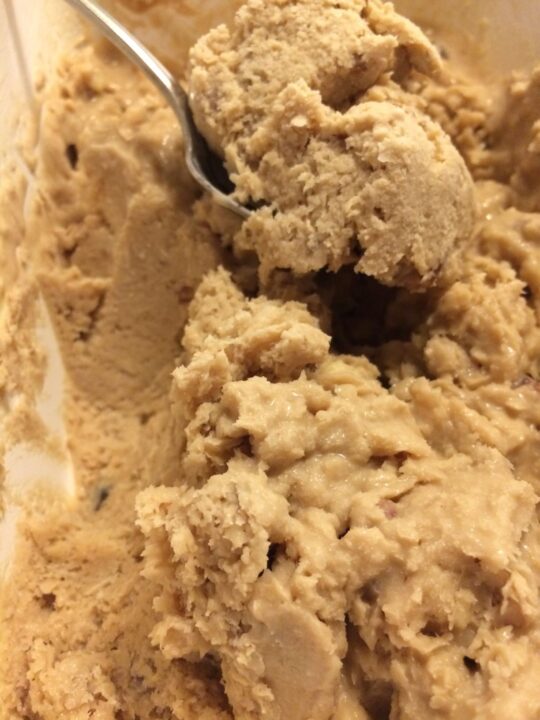
It’s summer and that means more ice cream recipes! This caramel walnut ice cream requires no churning and it doesn't contain any eggs. It is one of my favorite ice creams for many reasons. For one, my homemade caramel is so incredibly tasty and I use it with several other recipes too. Pair it with walnuts and wrap it in the creaminess of heavy cream and coconut milk and you get heaven.
I love how this ice cream is quick to prepare, stays soft days after, and requires no heavy equipment! No eggs required which saves you ingredients and time.
I have tried making this same recipe with candied walnuts and I just wasn’t happy with the turnout. Roasting the nuts after I dipped them in the caramel gave the caramel a darker flavor that was awesome for candied walnuts, but not for the ice cream. I tried blending the candied walnuts straight into the dairy ingredients and the texture was all wrong. I could have just chopped up the walnuts and mixed them in then added any extra caramel but that would have given it less of an overall, even, caramel flavor. Also, making the candied walnuts in the first place took a lot more time and use of the oven, which I like avoid in the summer!
In the end, it's much easier and tastier to just add in the homemade caramel and chopped nuts after freezing the dairy for a bit. Honestly, you can try another method and it would likely be great, as long as you get the nuts and caramel in there because they're insanely good!
I didn't even think about adding egg into this recipe. Egg usually helps making a richer ice cream that stays softer. However, I have found that you have to add a lot of eggs and then your flavor is negatively impacted. I'm definitely not willing to risk that with ice creams. For this recipe egg is just not needed. Sugar helps soften ice cream as well and you have you need here.
More Similar Recipes
If you enjoyed this recipe and you're looking for more cold treats, check out these recipes:
- Homemade Blueberry Ice Cream (no churn, no egg)
- Homemade Strawberry Ice Cream (no churn, no egg)
- Blueberry Cookie Dough Yogurt Drops
- Mango Apricot Strawberry Yogurt Drops
- Homemade Whipped Cream by Hand
Caramel Walnut Ice Cream (no churn, no egg)
Ingredients
For the Caramel
- 5 tablespoon unsalted butter
- ¾ cup brown sugar
- 3 tablespoon raw honey
- pinch of sea salt
- 1 ½ teaspoon blackstrap molasses
For the Remainder of the Ice Cream
- ½ cups finely chopped walnuts or almonds
- 1 cup full fat coconut milk option to use low fat
- 2 cups heavy cream
Instructions
Make the Caramel
- In a small saucepan combine all ingredients for the caramel. Heat on low for about 6 minutes, then decrease to Lo for about 3 more minutes. Stir continuously (using spatula or chopstick). Set aside and allow to cool while making the remainder of the ice cream.
Make the Remainder of the Ice Cream
- Finely chop walnuts or substitute almonds, set aside.
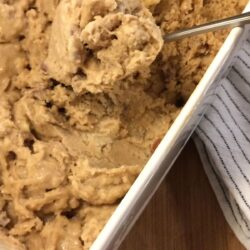
- You can combine dairy ingredients directly in a loaf pan (bread pan) or in a bowl. Whisk together coconut milk and heavy cream. Freeze in a loaf pan for about 2 hours, covered with a lid or foil. It should be slightly hardened at this point. Drizzle in the caramel and sprinkle in nuts. Use a chopstick to stir. At this point the ingredients will likely all combine together, as opposed to creating a ribbon of caramel. If you’re wanting the ribbon effect, then wait until the dairy ingredients are much more solid and make sure the caramel is cold before drizzling in the caramel.
- You’ll want to freeze the ice cream for a total of 6-8 hours, stirring up the ingredients about every 2-3 hours (only stir 3 times max then let sit).
- After freezing, you can transfer ice cream to smaller jars to be more easily accessible for a quick dessert ( I use 8 oz. mason jars).
- The ice cream will stay nice and creamy and you shouldn’t have to let it thaw before enjoying!
Anonymous
This recipe is so easy and delicious!