Three different methods for making homemade whipped cream: mason jar, whisk, milk frother!

I have to be honest, I was never patient enough to make my own whipped cream, so I just never had it in the house. But, I started making my own ice cream and cheeses and now it seems like I have a constant supply of heavy whipping cream alll the time.
We don't use whipped cream from a can particularly because it's packaged with nitrous oxide...and no that's not safe. Especially not safe to be eating the whipped cream directly from the can (yes of course I grew up doing this too). But now I have the knowledge to not do it!
Important Factors for Making Whipped Cream
- Use heavy whipping cream, it just works the best
- It needs to be cold! You can always stick it in the freezer for a bit to make sure it's chilled but yes it will freeze, so just do it for a few minutes
- Get ready for a bit of a workout when doing it by hand and be patient
- Yes it will taste better after all your effort
Various Methods for Making Whipped Cream by Hand
Ohhh buddy. Let's get to the fun part.
- Mason Jar
I use a pint jar (16oz.). Make sure you have cold heavy cream, and fill the jar half way (1 cup worth). If you want to make more than that and you're tempted to fill it more....just don't. The only way to make whipped cream is to whip or shake air into it so you have to have that half a jar of empty space to do so. Plus, as it thickens it expands and it will reach the top of the jar. Make double batches if you want more.
Use a lid and ring to seal the jar (not a plastic twist on). Once the jar is sealed tight, start shaking! Unless you don't trust your grip, try holding the jar with your fingertips. The less you're touching the jar the better because your hands will heat it up. Shake for about 5-6 minutes for a killer tricep workout. You'll start to hear the liquid sloshing around less and less. I would check it around 4 minutes to see if it's where you want it.
2. Milk Frother
Since Ikea started an online store we've been obsessed! Mostly because they sell safe products (free of chemicals and harmful metals). My husband asked if I could use a milk frother and my first response was "no." But, he was excited and bought one anyways....because this little guy was only $2.99. *He just bought more recently because they were on sale for $1.99.
You can also find a milk frother on Amazon for a higher price like this one!
So, of course I started whipping heavy cream daily. Hand held milk frothers are small. The key is to only froth a small portion of heavy cream at a time, but boy howdy does it work (I'm talking about 2 -4 oz. at a time only).
If you use want to make a little more at a time, start by shaking it in a mason jar for about 5-6 minutes, then split the pint jar into 2 smaller 8 oz. jelly jars and use the milk frother a bit more to make sure it gets all the way through the bottom and middle portions. Put them in the fridge for even just 5-10 minutes and it'll stiffen up even more.
3. Using a Whisk or Electric Beater
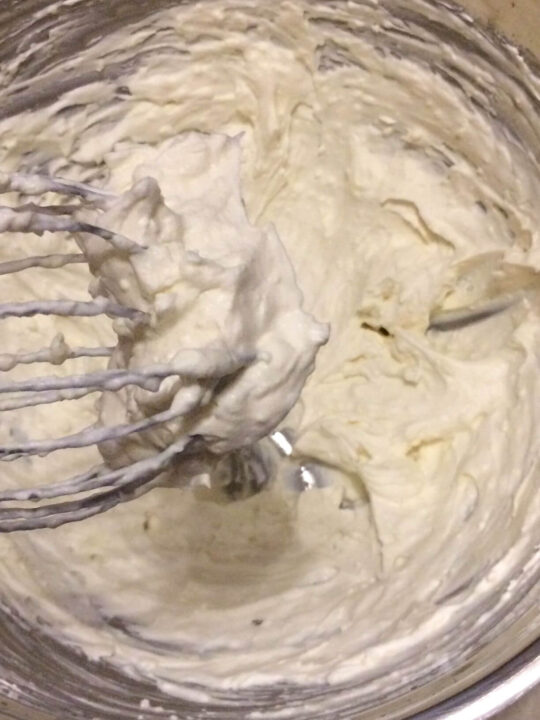
Even if you're just wanting to whisk up ½ or 1 cup heavy cream, still use a large and deep bowl. I like to use my 8 qt, heavy stainless steel mixing bowl. It's a great size so you can hug the bowl while whisking with all your might without worrying about heating the bowl too much. The depth helps avoid splattering and you can get more air into it.
Another key is to use a balloon whisk! This also helps to get more air into the cream instead of just beating it with a heavy, denser whisk.
Whisking Time
When whisking by hand give it about 4 minutes for firm peaks. You'll get soft peaks around 3 minutes but just go a bit longer and they'll stiffen up nicely.
Don't Tap the Whisk Against the Bowl
When you're done you'll have a good amount of whip on your whisk. If you tap it against the bowl to knock it off you'll loose air and volume. Instead, hold your forearm over the bowl and knock it against your forearm gently. Still a little left? Just enjoy that for yourself!
An electric mixer is also an option, but one that I never use! I find that using the mason jar method and whisking by hand it much more convenient so I don't have to haul out big equipment and it's less clean up!
Similar Recipes
- Homemade Strawberry Ice Cream
- Homemade Blueberry Ice Cream
- Triple Berry Pie with Rhubarb
- Double and Single Crust Pie Pastry
- Maple Pumpkin Pie with Nut Crust

Homemade Whipped Cream by Hand
Ingredients
- Heavy Whipping Cream
Instructions
Method: Mason Jar
- Using a 16 oz. pint jar, fill it half way with heavy whipping cream. Seal tight with a metal lid and ring. Shake by hand for about 5-7 minutes, trying to not wrap your hands around it too much because you don't want to heat it up. Once you start hearing less sloshing check on it. Stop when it's thick to your liking. Put the jar in the fridge for at least 10 minutes and it will stiffen up even more.
Method: Milk Frother
- Add small portions at a time to a small bowl (4 oz. jelly jars work great). Froth using a small hand held milk frother. Add whipped cream to a larger bowl and repeat process with another small portion. It doesn't work as well to froth larger portions at a time! Put the bowl in the fridge for at least 10 minutes and it will stiffen up even more.
Method: Whisk
- Use a large, deep mixing bowl (I use an 8 qt. stainless steel mixing bowl no matter how much cream I'm whipping). Use a hand whisk or electric mixer and whisk the cream. If you're doing this by hand it will take about 4 minutes for stiff peaks. Tap the whisk against your forearm to empty the whisk, not against the bowl. Store the whipped cream in the fridge after whisking to keep it cold and airy.


Leave a comment and rating, I'd love to hear from you!